fbpx
Trust the Process: How to Create an Effective Workflow

Trust the Process: How to Create an Effective Workflow

Running a business, maintaining a website, and balancing personal life can feel like a bit of a rollercoaster. But with the right process, it can be manageable and enjoyable. Here’s how I approach creating a process that keeps everything running smoothly.

Step 1: Start with Pen and Paper

There’s something incredibly grounding about starting with pen and paper. When I need to get organized, the first thing I do is sit down with a notebook. Writing things down helps me to clear my mind and get a tangible sense of what needs to be done.

Step 2: List All Tasks

Next, I list out everything I need to accomplish. This could be anything from creating social media posts for the week, managing client website maintenance, to balancing home and family life. Getting everything down on paper is the first step to making it feel manageable.

Step 3: Prioritize Tasks

Once I have my list, I prioritize. This means identifying what needs immediate attention and what can be scheduled later. Prioritizing helps ensure that urgent tasks are handled promptly, and nothing critical falls through the cracks.

Step 4: Break Down Each Task

Breaking down tasks into smaller, actionable steps is key. For example, creating social media posts involves brainstorming ideas, designing graphics, and scheduling posts. By breaking it down, each step feels more achievable, and I can track my progress easily.

Step 5: Trust the Process

Finally, I remind myself to trust the process. It’s easy to feel overwhelmed when looking at a long list of tasks. But by taking it one step at a time and trusting that I have a solid process in place, I can stay calm and focused.

Why Trusting the Process Works

Trusting the process is about having faith in your ability to manage your tasks and knowing that you have a system in place that works. It’s about being patient with yourself and recognizing that everything takes time and effort.

Practical Tips to Start Your Process

  • Set Clear Goals: Know what you want to achieve with each task.
  • Use Tools: Digital tools like Trello or Google Drive can help keep you organized.
  • Stay Flexible: Be prepared to adjust your process as needed.
  • Take Breaks: Don’t forget to give yourself some downtime to recharge.

Conclusion

Creating a process might seem daunting at first, but once you break it down and start implementing these steps, you’ll find it much easier to manage your tasks and achieve your goals. Remember, trust the process and stay consistent. You’ve got this!

Need Help Creating Your Process?

If you’re feeling overwhelmed and need help creating a process that works for you, let’s chat! I specialize in helping solo business owners streamline their tasks and reduce stress.

10 Simple Steps to Choosing the Right Software for Your Business

10 Simple Steps to Choosing the Right Software for Your Business

Choosing the right software or tools for your business can feel like a big decision, but it doesn’t have to be overwhelming! With the right approach, you can find a solution that meets your needs and helps your business thrive. In this post, I’ll break down the process into 10 simple steps to guide you through the decision-making process.

  1. Identify Your Needs: Start by identifying the specific challenges your business faces and the tasks you need help with. Make a list of essential features and functionalities that will address these needs.
  2. Set Your Budget: Determine how much you’re willing to invest in software. Consider both upfront costs and ongoing subscription fees to ensure the software aligns with your financial resources.
  3. Research Options: Explore different software options available in the market. Read reviews, compare features, and take advantage of free trials or demos to get a feel for each option.
  4. Consider Scalability: Think about the future growth of your business and choose software that can grow with you. Avoid outgrowing your solution too quickly and having to switch to something else.
  5. Check Integration Compatibility: Ensure compatibility with other software or tools you’re already using. Look for seamless integration to streamline workflows and data management.
  6. Seek Recommendations: Reach out to fellow business owners or industry peers for recommendations. Hearing firsthand experiences can provide valuable insights to inform your decision.
  7. Test Before Committing: Take advantage of free trials or demos offered by software providers. Use this opportunity to evaluate functionality, user interface, and overall suitability for your business needs.
  8. Evaluate Support and Training: Consider the level of customer support and training resources provided by the software vendor. Accessible support and training materials can facilitate successful implementation and usage.
  9. Make a Decision: Weigh the pros and cons of each option against your criteria and make a decision that aligns with your business needs and goals.
  10. Start Small and Learn: Implement the chosen software gradually and explore additional features as you become more comfortable. Monitor performance, gather feedback, and continue to optimize your business processes.

Conclusion:

Choosing the right software for your business doesn’t have to be daunting. By following these 10 simple steps, you can make an informed decision and select a solution that empowers your business growth and success.

Conquering Your Forms: Top 5 WordPress Form Builder Plugins Compared

Conquering Your Forms: Top 5 WordPress Form Builder Plugins Compared

Building effective forms is crucial for any WordPress website. Whether you need a simple contact form, a complex application form, or anything in between, the right WordPress form builder plugin can save you time and frustration. But with so many options available, choosing the best one for your needs can be overwhelming.

This post dives into five of the most popular WordPress form builder plugins, exploring their strengths, weaknesses, and ideal use cases.

1. WPForms: The User-Friendly Drag-and-Drop Champion

Pros:

  • Drag-and-drop interface makes form creation incredibly easy, even for beginners.
  • Wide range of pre-built templates for common forms (contact, email signup, etc.) saves you time.
  • Free version offers essential form building features, perfect for basic needs.
  • Paid plans unlock advanced functionalities like conditional logic, file uploads, and payment integrations.

Cons:

  • Free version may be limiting for complex forms requiring advanced features.
  • Customization options might feel less extensive compared to some competitors.

Best For: Beginners, users with basic form needs, and those wanting a user-friendly interface.

Gravity Forms Logo

2. Gravity Forms: The Powerhouse for Complex Forms

Pros:

  • Extremely powerful and flexible, allowing for intricate form creation with advanced features.
  • Extensive customization options for forms, conditional logic, and data management.
  • Huge library of add-ons available for various functionalities and integrations.

Cons:

  • Steeper learning curve compared to drag-and-drop builders.
  • Paid plugin with various licensing options, can be more expensive for some users.

Best For: Experienced users, those needing complex forms with advanced features and extensive customization.

3. Formidable Forms: Forms Go Beyond with Directories, Quizzes, and Polls

Pros:

  • Combines form building with features for creating online directories, quizzes, and polls.
  • Offers a free version with basic form creation and limited directory features.
  • Paid plans unlock advanced features like multi-step forms, file uploads, and payment integrations.

Cons:

  • Interface might feel less intuitive compared to pure form builders.
  • Functionality diversity may be overwhelming for users only needing basic forms.

Best For: Users wanting forms combined with directory, quiz, or poll functionalities.

4. Fluent Forms: Lightweight Speed Demon for Essential Forms

Pros:

  • Lightweight plugin with a focus on speed and performance, ideal for websites with heavy traffic.
  • Free version offers essential form building tools, perfect for simple contact forms.
  • Paid plans offer advanced features like multi-step forms, conditional logic, and file uploads.

Cons:

  • Less extensive feature set compared to some plugins, limiting it for complex forms.
  • Customization options might be less robust for users seeking highly individualized form design.

Best For: Users prioritizing website speed and needing basic to moderate form functionality.

5. Ninja Forms: Freemium Powerhouse with Add-On Flexibility

Pros:

  • Popular freemium plugin with a simple interface, making it easy for beginners.
  • Free version allows basic contact form creation.
  • Extensive selection of paid add-ons unlocks features like file uploads, payment integrations, and multi-step forms.

Cons:

  • Functionality heavily relies on paid add-ons, which can increase costs.
  • Free version offers limited features compared to some competitors.

Best For: Users comfortable with freemium models and seeking flexibility through add-ons.

This list provides a starting point for choosing the right WordPress form builder plugin for your website. Consider your specific needs, desired features, comfort level, and budget to make the best decision. Don’t hesitate to try out free versions or demos to see which plugin feels most user-friendly for you!

Need some help deciding? Book a call with me. Let’s chat.

How to Organize Your WordPress Dashboard Like a Boss

How to Organize Your WordPress Dashboard Like a Boss

Don’t you just love the WordPress dashboard? A ton of randomness that sometimes feels like a cluttered attic overflowing with forgotten furniture and dusty memories. This post equips you with the knowledge and tools to transform your dashboard from a chaotic jumble into an organized haven of efficiency.

Why Organize Your Dashboard?

Think of a well-organized dashboard as your website’s command center. By streamlining your layout, you’ll:

  • Save time: No more hunting for specific settings or plugins. Everything will be at your fingertips.
  • Reduce stress: A clean interface translates to a calmer mind, allowing you to focus on website optimization.
  • Boost productivity: Streamlined workflows mean more time spent creating amazing content and growing your business.

Ready to Declutter and Conquer?

Let’s dive into the tools and strategies that will turn you into a WordPress dashboard organizing pro:

1. Utilize the Screen Options Menu:

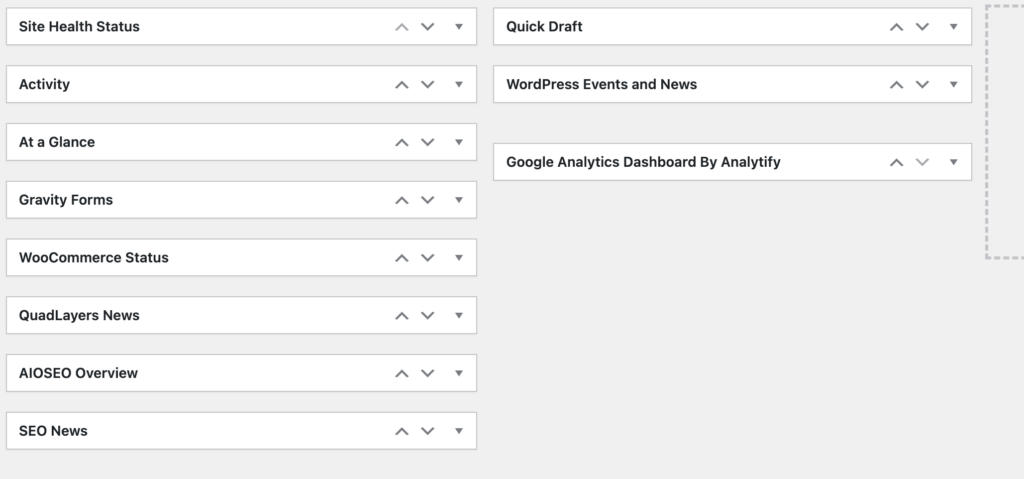
This unsung hero, located at the top right corner of your dashboard, offers a treasure trove of customization options. You can choose which dashboard elements to display, allowing you to hide irrelevant widgets and focus on the information you use most frequently.

2. Unleash the Power of Drag & Drop:

WordPress allows drag-and-drop functionality for most widgets. Rearrange your dashboard widgets to prioritize the ones you use most often. Place frequently accessed settings like “Posts” or “Comments” near the top for easy access.

3. Tame the Plugin Jungle:

Plugins are a website’s Swiss army knife, adding functionality and features. However, an excessive number can lead to clutter. Here’s how to manage them effectively:

  • Deactivate and Delete Unused Plugins: Regularly review your plugins and deactivate or delete any you don’t actively use.
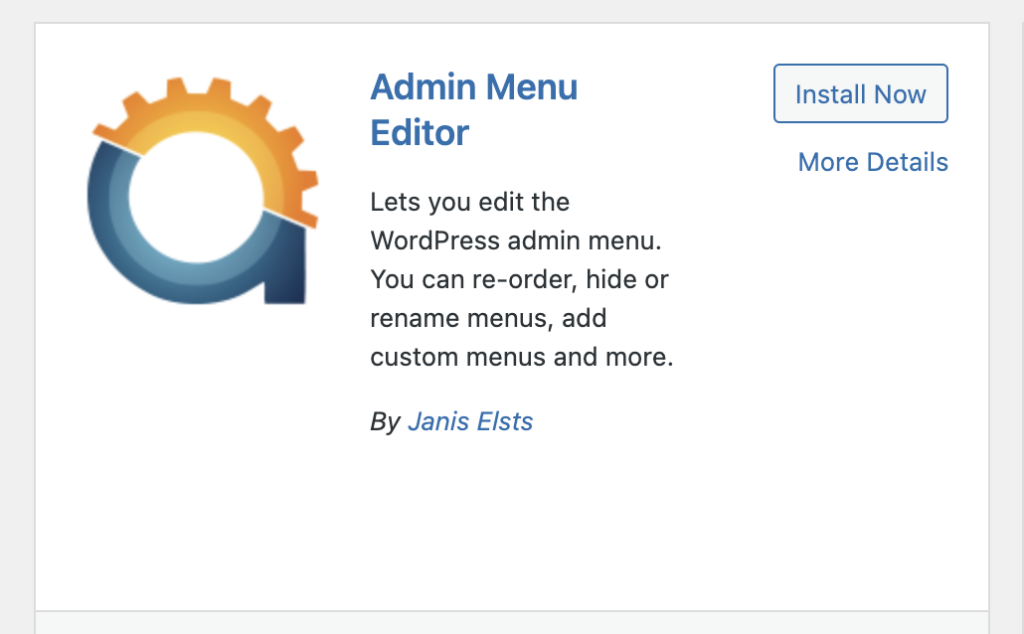
  • Organize with Folders (Requires Plugins): Take your plugin organization a step further with plugins like “WordPress Folders Plugin” or “WP Admin Menu Editor.” These allow you to group plugins into folders, keeping your dashboard even more streamlined.


4. Master the “At a Glance” Section:

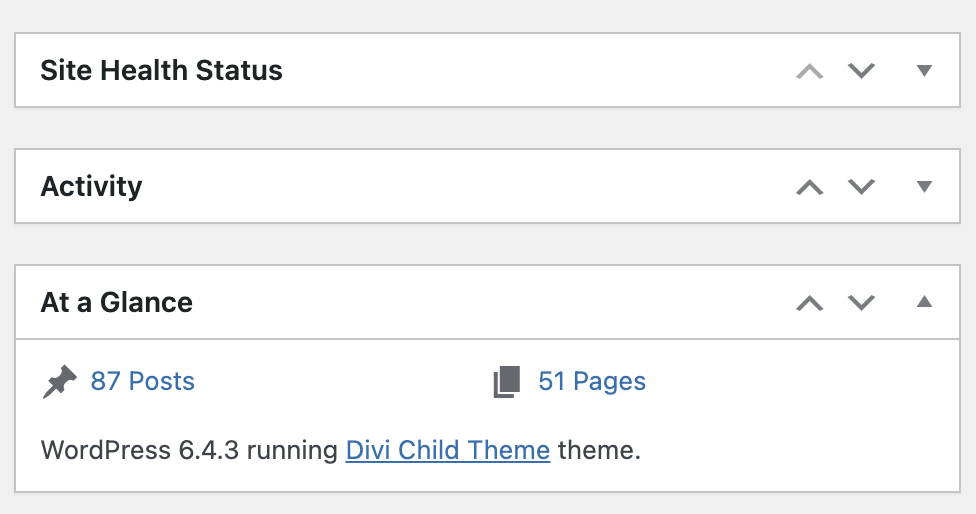
This widget offers a quick snapshot of essential website information like comments, drafts, and updates. Keep it visible for a convenient overview of your website’s health.

5. Create Custom Menus (Advanced Users):

Admin Menu Editor plugin logo and text

For experienced users, consider creating custom menus using plugins like “WP Admin Menu Editor.” This allows you to rearrange and rename menu items, further tailoring your dashboard to your specific needs.

Bonus Tip: Explore Dashboard Customization Plugins:

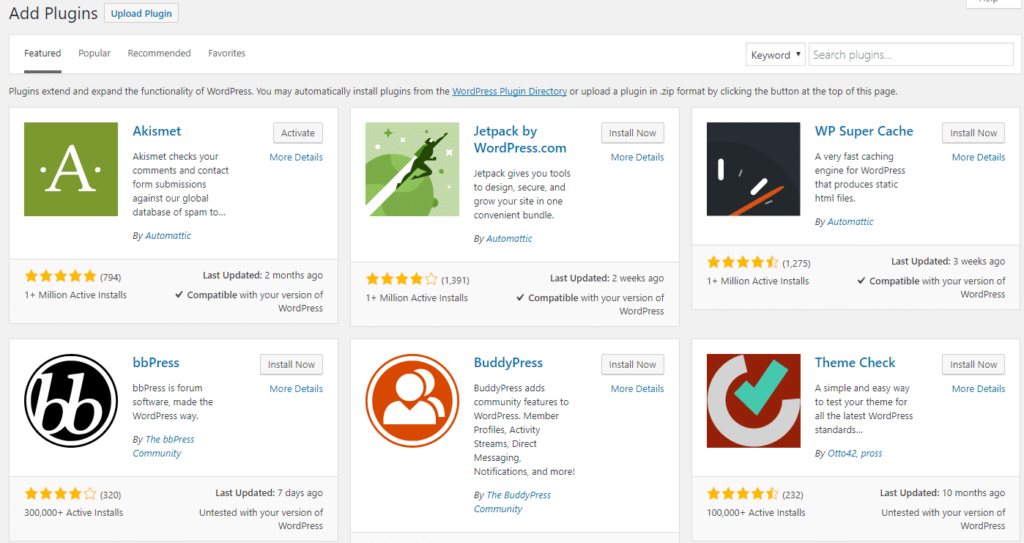
The WordPress plugin repository offers a wide variety of plugins dedicated to dashboard customization. These can offer additional features like custom layouts, color schemes, and widget management tools. Explore and find one that fits your workflow and aesthetics.

Maintaining Organization: A Proactive Approach

Remember, organization is an ongoing process. Regularly audit your dashboard, declutter unused elements, and consider updating your layout as your website’s needs evolve.

Embrace the Organized Life!

By following these tips and embracing a spirit of organization, you’ll transform your WordPress dashboard from a chaotic mess into a well-oiled machine. A calm and efficient dashboard sets you up for website management success, allowing you to focus on what truly matters – growing your online presence and achieving your business goals!

8 Reasons Why Metricool Should Be Your Social Media Marketing BFF

8 Reasons Why Metricool Should Be Your Social Media Marketing BFF

Juggling multiple social media accounts can feel like a never-ending circus act. What if there was a tool that could streamline your workflow, boost your engagement, and provide valuable insights – all in one place? Now you can. Say hello to Metricool, the social media manager’s secret weapon.

Here are 9 reasons why Metricool should be your go-to platform for conquering the social media landscape:

Manage All Your Accounts in One Dashboard

Metricool lets you connect all your major social media profiles. Just imagine being able to manage Facebook, Instagram, Twitter, LinkedIn and more. No more constantly logging in and out.  You can schedule posts, respond to comments, and track performance from a single, unified dashboard.

Effortless Scheduling

Planning your social media content is key to consistency and success. Metricool’s scheduling feature allows you to create and queue up posts for all your platforms at once. What does this mean for you? No more scrambling to meet deadlines or last-minute posts. You can schedule your content for the optimal times and watch your engagement soar.

Powerful Analytics at Your Fingertips

Metricool goes beyond just scheduling. It provides analytics that gives you a clear picture of your social media performance. Track metrics like follower growth, engagement rates, and reach to understand what’s working and what’s not. Use these insights to refine your strategy and get the most out of your social media efforts.

Competitive Analysis Made Easy

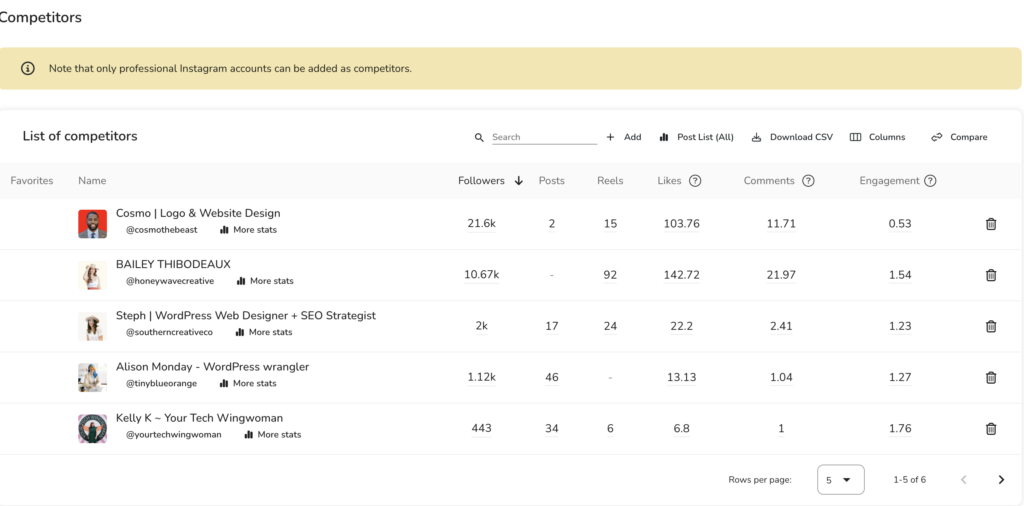
Stay ahead of the curve by keeping an eye on your competitors. Metricool allows you to track their social media activity. You can see their most popular posts, audience demographics, and more. You can use this information to identify trends and opportunities to differentiate your brand.

Save Time and Effort with Bulk Publishing

Managing multiple social media accounts can be time-consuming.  That’s why I love Metricool’s bulk publishing feature. It allows you to upload and schedule content for all your platforms at once. This saves you time and allows you to focus on other aspects of your social media strategy.

Respond to Comments and Messages Efficiently

 Staying engaged with your audience is crucial for building relationships and fostering brand loyalty. Metricool allows you to manage all your comments and messages from a centralized location. This makes it easier to respond promptly and keep the conversation flowing.

Collaborate with Your Team Seamlessly

If you’re working with a team on social media marketing, Metricool streamlines collaboration. Assign tasks, share reports, and get everyone on the same page with user roles and permissions.

Affordable Pricing

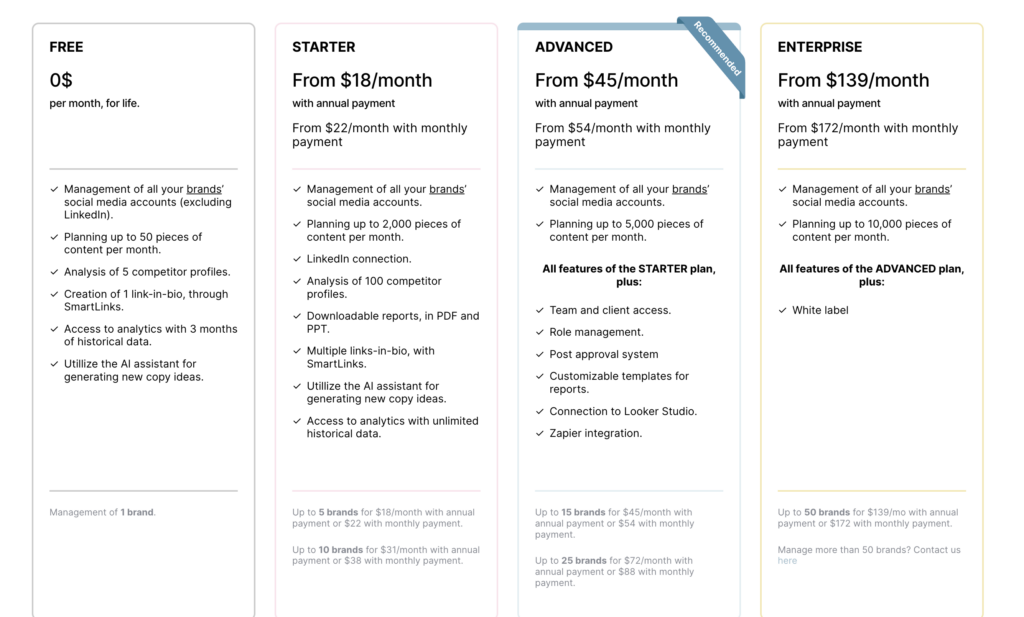
 Metricool offers a variety of pricing plans to suit different needs and budgets. There’s even a free plan that lets you get started with basic features.

Ready to Take Your Social Media Marketing to the Next Level?

Metricool is a powerful and versatile tool that can help you save time, improve efficiency, and achieve your social media marketing goals. So why not give it a try?