Mercari plus Uber = Mercari Local Delivery

Mercari plus Uber = Mercari Local Delivery

Craigslist has been great… but hello Mercari Local Delivery!

I’ve shared a few ways to make money online. One of the ways was through reselling items you have around the house or collecting dust in the closet.  I have been reselling on Poshmark and some times Craiglist for a while now, and in 2020, I started using is Mercari.  Mercari is a an app/website where you can sell anything from toys to clothing and accessories, and even furniture. It’s pretty easy to get set up and start your reselling business within minutes. Just make sure you have great pictures, pricing , and descriptions of your items.

Picture of toys and clothes that can be sold on Mercari and other platforms

In the past , you could only ship your sold items through via USPS,  UPS, or FedEx, but Mercari has partnered with Uber to provide local delivery.  Here are the reasons why this is a good thing:

  1. After your item sells,  an Uber  driver will pick up and drop off your item, contact-free. You will never have to share your address with the  buyer
  2. You get to pick the time that works for you, which ensures that your item gets picked up and dropped off on your time.
  3.  All of the transactions are taken care of within the Mercari app….so no need to exchange cash.
  4. No need to print shipping labels, which saves you time and ink.

So for those of you who use Craigslist or Facebook Marketplace to resell items , you should give Mercari a try. It’s a lot safer to use their local delivery option , than to deal with the scheduling meet up spots, cash exchanges , and awkward exchanges with strangers.


How to take Quality Product Pictures at Home

How to take Quality Product Pictures at Home

So you want to open your online store, but you need some good product pictures. You don’t have a high-end camera or the budget to hire a photographer, and you may think you are out of luck.
 
Well, today is your lucky day. More than likely, you have everything you need to do it yourself.
 
Investing in a professional photographer is always a good thing. I would focus on getting more sales before making that type of investment. Let’s talk about how you can take high-quality product photos with your smartphone.

Items Needed:

  • Smartphone ( Android or iPhone )
  • Lightbox or Lighting Setup
  • Clean Surface or background

Step 1: Position your Products

 
The first step is to make sure that the environment you are setting will make for a good image, to begin with. Customers on your site l want to see clear pictures of your products.
 
So it is up to you to make sure your products are clean and your setup is correct before you start snapping. There are a few basic rules to follow:
 

Watch your backgrounds

Product pics of Juice


A plain white background is best for most of your product shots. This lets your product stand out and removes any distractions.
 
You can also set the scene with a lifestyle shot that shows your products in their environment. For fashion, that could be on a model. For food items, you would shoot in the kitchen or dining area. Bikes or camping gear looks great outdoors.
 
No matter what, make sure the background works for the product and for your target customer. Avoid distractions and make sure any scenery adds to the focus instead of taking away from it.

Lighting for Product Pictures

Natural lighting is free and much better than using artificial light. If you are shooting indoors, you can set up your own production photo studio. You can use a homemade light studio or invest in a lightbox. The goal is to light your product evenly and without shadows.
 
 
Here is a link to one of my favorite lightboxes I used to take my own product pictures:

Shoot multiple angles and details

Product Pictures at angles

 
Customers will want to see as much as they can before they make a purchase.  Make sure you get pictures of your products from all angles. Buyers need to be able to see the product as clear as they would in person. So any pics of your labels or product details make a difference.

Step 2: Choose your Camera


Not all smartphones are created equal, especially when it comes to their cameras. iPhones are known for being the best, but the truth is that some Android phones are great as well. That means you can take great images regardless of if you’re team Android or iPhone.
 
Your best choices for a phone camera are the following:
 
  • iPhone 8 or newer
 
  • Google Pixel 2
 
  • Samsung Galaxy S8 or S9
 
  • Samsung Galaxy 8 Note
 
Any phone that has a camera that is at least the 12-megapixel mark will give you the image quality you need.

Take Your Product Pictures To the Next Level

 
There are other ways to make sure your product pics will be great. Here a few pointers:
 
  • Play with your settings. Go into the settings for your camera and see what you have the power to change. Try out one setting at a time, and see what kind of differences changes make to your final image.
 
  • Edit elsewhere. Don’t use your phone to crop or edit your images. You’ll get much better results by editing your pictures on a computer and using Photoshop.
 
  • Don’t overdo it. Whatever you use to edit your photos, beware of overediting. You want your product to still look natural.  Cropping or removing backgrounds is ok, but make sure you’re not changing the photo completely.
            Over edited product picture
  • Edit your images. You can get edited images without learning how to use software or spending time editing your own. You can outsource it. Pick the shots you want to use and find someone on Fiverr to edit them for you. You’ll get back perfectly edited photos in a short turn around time.


  • Use a Tripod to ensure that you get a consistent picture without shaky or unsteady hands

Step 3: Start Taking Your Product Pictures

Lightbox Set up Lightbox for Product PicturesDIY Lightbox set up

You don’t have to have a professional camera or even a professional behind the shutter button anymore. If you need better images for your store, it’s easier now than it ever has been. Grab your smartphone, set up your “studio” and start taking photos of your products.
 
Remember that if they aren’t perfect, you can always take more.
 
Have any questions about taking product pictures? Comment below, or contact me 🙂
How to sell your services online using Calendly, Zoom, and Stripe

How to sell your services online using Calendly, Zoom, and Stripe

It’s time to learn how to sell your services online.

It’s safe to say that Covid is here and we have no choice but to make some pivots and changes. I wrote about what it means to Digify your business. This is one step you can take to automate some of your processes.

As a service provider, instructor ( yoga, dance, personal trainer, etc), or coach, you want to be able to offer virtual services… and get paid for them. You also want the process to be as simple as possible.

You can continue to sell in your DM and manually send links and email back and forth…

Oh, and drop your CashApp link for payments…

Or you can automate and integrate with the use of a few dope tools.

There are three tools you can use to get the job done. They are:

  • Calendly
  • Stripe
  • Zoom


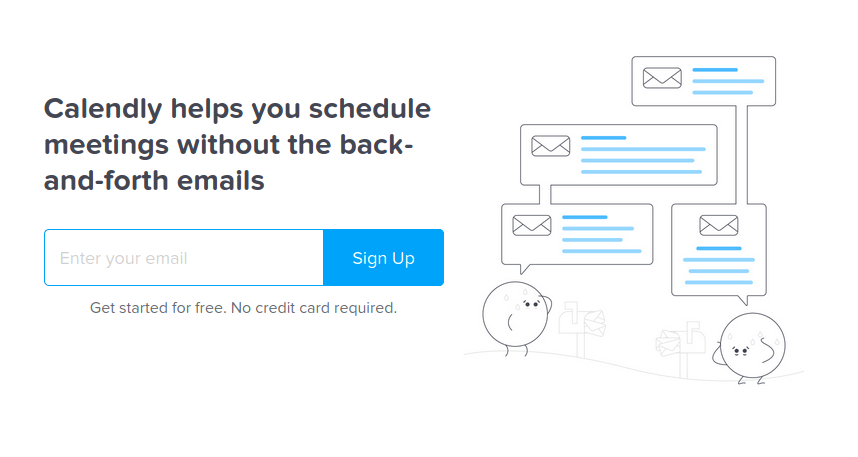
Step 1: Create your event in Calendly

Calendly is one of my favorites. This tool allows you to create online bookable events that are synced with your calendar. You simply sign up for an account, connect your Google or Outlook calendar, and set up your events.

Calendly Home Page

As a new user, you are able to use all features of the paid plan for 14 days. After that, you are downgraded to a free plan. To use the Stripe integration, you need to be on the 12$/month plan. (Compare plans and pricing)

After you’ve set up your account, you can start creating bookable events.

Calendly Event


One-on-One or Group events can be created. When choosing Group events, you can set a number for max. invitees for a booking.


Zoom is my favorite way of meeting online.

If you want to use Zoom as a meeting location for the first time, you will have to go to integrations and connect it to zoom. Oh, and btw, connecting to  Zoom to Calendly requires a paid account (Calendly, not Zoom).

But as you can see in the list above, it is also possible to choose Google Meet, GoToMeeting, or provide any type of location details.

For each bookable event, Calendly creates a unique link that you can share with anyone online.

Ok moving on…

On the next screen, you can set when people can book this event. Double-check the time zone and choose the length of time for the call/event.

Calendly also creates a central landing page for your account that shows all bookable meetings, if you do not want that specific event to be listed on that page, make the event secret.

Calendly Calendars

Other things you can do in  Calendly are:

  • Invitee Questions: Ask questions to make the online event a success. For example, ask your attendees to provide the material you want to discuss, which questions they want to discuss, etc.
  • Notifications and Cancellation Policy: Customize all email notifications (confirmation, cancellation, reminders) and add a custom cancellation policy.
  • Confirmation page: You can set a custom confirmation page that a user gets sent to after making a booking.
  • Collect Payments: Stripe or Paypal

Now it’s time to create your Stripe account before you can finish setting up your Calendly event.

Step 2: Connect your Stripe Account

You need to set up a Stripe account to be able to accept payments via Calendly events. Setting up your Stripe account takes about 10-15 minutes, or faster, depending on your business’s location.

Using Stripe does not involve fixed monthly costs, instead, they take a percentage from each transaction.

Stripe HOme Page

After you’ve set up your stripe, head over to the integrations page of Calendly.  Click on Stripe and connect your account.

calendly integrations


If you have finished connecting your account, select Stripe as a payment option in your Calendly event.

Calendly Set up

Now you are finished setting up your first Calendly event and can start promoting the service. When customers click on your event, this is what they will see. As you can see the dates that are available are highlighted and the cost is listed to the left. Once they click on their desired time, they must enter their card information and pay to book the session.


Calendly Calendar Example

Calendly example


After a booking is made, a calendar event will be added to the customer’s calendar and your own.


Within that calendar invite, details for the Zoom call are added automatically.


Conclusion

This was a short tutorial on how to sell your services online with Calendly.

Calendly, Zoom, and Stripe can be used together to sell your services online.

You share the link, they choose a time, pay, and get the zoom link via email.

That’s it … That’s all.

Do you want to discuss how this could work for you? Let’s chat in a virtual coffee chat!


5  resources to simplify your daily business tasks.

5 resources to simplify your daily business tasks.

2020 has proven to be an interesting year. You had to find a balance between home, work, and virtual schooling. I want to make 2021 easier for you. I put together a list of 5 resources you can use to simplify your business tasks.

Simplify your Instagram and Pinterest Posting

Tailwind

Sometimes your brain is so scattered that it’s hard to remember what to do and where to post and what time to post etc. It seems easier to stick to what you know, instead of finding new ways to do the same tasks. You get my point. I mentioned Tailwind before, but it is quickly becoming one of my favorite tools. I not only use it to automate posts for the charities that I manage, but I use it to automate all of my Instagram posts for my earring business. On Sundays, I upload my post for the week and schedule them. I use the hashtag generator to maximize my post hashtags. You can let Tailwind decide the custom times, or set your own times and number of post you want to schedule per day. If you want to try Tailwind for yourself, you can sign up for a trial account. Click here to check out my latest video tutorial on how to use Tailwind for your business. 


Simplify your FaceBook Group Posting

PilotPoster

I just recently found about this tool while helping one of my good friends find a solution. Pilot Poster is a Facebook group auto poster. You can post to any Facebook groups that you are a part of.  It’s designed to help you save time and help you engage your target audience on Facebook. 

Simplify your Graphics Creating Process

Canva

canva LOGO

Even though I have experience in PhotoShop, I like to use Canva to not only create graphics for my blog but also create graphics for all of my social media posts and profiles. You can create carousels, animated graphics, workbooks, and more I just recently used the Canva app on my phone to create Instagram story graphics.  You don’t have to be a graphic design guru to use it. Their templates make creating graphics easy. 


Simplify your Photos

Unsplash

Have you seen those IG feeds or blogs that make you wonder if people have a personal photographer on staff? More than likely they use stock photos to the fullest. I personally use a lot of stock photos when I write my poetry. I can always find the perfect picture that communicates the words I’ve written. 


Simplify your Forms

Gravity Forms

Gravity Forms

When I first started my business, Microsoft Word was my favorite way to email quotes, and forms to my client. I started using Gravity Forms when I needed a beautiful form to collect client information and to create workbooks and worksheets. No more save as for me. When my clients fill out a form, the responses are stored in a database and also sent to my inbox. 


Conclusion 

There are many other options, but these are my go-to problem solvers. Are there any tools that you use that can be added to this list? Comment below and let me know. If you need more assistance with finding ways to simplify your business tasks, feel free to reach out. 

How to start a t-shirt line for your business

How to start a t-shirt line for your business

Problem: You want to add a t-shirt or product line to your business. You need a new revenue stream for your online business, and you don’t want to purchase a bunch of inventory that may sit and collect dust. You also do not have the time to add more clients to your schedule. (BTW, this post contains affiliate links)

Solution: You could use a drop shipping company to create and send your custom designed t-shirt or product directly to your customers. There are many options to choose from but today I’m going to talk to you about how to use Printful to create a t-shirt line for your brand or business.

Printful makes it easy to put your designs on products such as tshirts, mugs, hats and even canvases. All that you have to do is upload your designs to products of your choice. Printful will fulfill your orders with on-demand printing and will send the products directly to your customers.

Action Steps: 

1. Sign up for a Printful account.

Printful Sign Up

2. Connect your WordPress Store ( Woocommerce). For those who have worked with me, you should have Woocommerce installed.

Printful Store Options

3.Upload a design to the product of your choice. In this case, we are going to use a t-shirt.

Printful t-shirt optionsPrintful t-shirt design

4.Publish the product in your store that you created.

  • When an order is placed, Printful will print your design on the t-shirt you selected
  • Printful ships the product directly to your customer
  • You pay Printful for products only when an order is placed.


Conclusion

I have a few clients who currently have t-shirt lines that we worked together to create using Printful. Here is a link to one of their stores.

If you have questions, or you need some assistance with getting your custom t-shirt line started, do not hesitate to contact me.


Kimani’s Website Creation Process – A Case Study

Kimani’s Website Creation Process – A Case Study

Yesterday my daughter,  Kimani,  launched her very first website. If you don’t follow me on Instagram or Facebook, you may have missed it.

As much as I wanted to do it for her, I thought it would be a great opportunity to learn how to do it herself. Today I’m going to walk you through the steps Kimani took to launch her site and also add her own line of apparel and mugs.

DISCLOSURE: THIS POST MAY CONTAIN AFFILIATE LINKS, WHICH MEANS I GET A COMMISSION IF YOU DECIDE TO MAKE A PURCHASE THROUGH MY LINKS, AT NO COST TO YOU. 


Site Creation and Launch Steps

Before she touched her computer, I encouraged her to pull out a pen and paper and plan as much as she could. 

Step 1 : Research and Plan

Kimani sat and did a brain dump of all the things she wanted to see and do with her new website. She followed the steps in the Anatomy of a Website E-book to plan content for each page. She also chose her fonts and brand colors that she wanted to use on her website and graphics.


She had a few options in mind when it came to business names, but she ultimately decided on Prism Ink Creations, which included her love for rainbows and the art of drawing/sketching. Once she decided on a name, she decided to design her own logo.

 Step 2: Purchase domain and hosting

Because she took the time to think of her business name in advance, creating a domain was simple. She did a search to see if prisminkcreations.com was available, and luckily it was available. We worked together to register her domain with Bluehost, and used their quick WordPress installation.

Step 3: Installed the Divi theme and pages


We decided to use a premium drag & drop theme and builder so that Kimani can easily change her design if necessary.

Step 4: Design and add content to each page

Using the content she created from step 1, she created each page of her site.


Apparel & Mug Creation Process


Step 1: Created design(s) for her apparel and mug line

Kimani initially sketched her designs, then we had them converted to a digital format. She then downloaded the file with a transparent background in png format.


Step 2: Installed and configured Woocommerce plugin

Woocommerce is a shopping cart plugin that will be used to sell her products.

Step 3: Signed up for a payment processor ( PayPal, Square, Stripe, etc.)

Step 4: Signed up for an account at Printful 

Printful is a print on demand company that will handle the creation and shipping of her products.

Step 5: Installed and set – up printful plugin

Step 6: Chose & customized her products in Printful

Step 7: Add products to the Printful store


Final Steps: 

Once it was all said and done, Kimani and I worked together to test the site to make sure it was not only responsive, but also to make sure that everything was functioning as it should.

Kimani admitted that at times her frustration would get to her , but she is beyond grateful that she was able to push through and get it done. Click here to check her website and product line.

So when it comes to launching, upgrading or maintaining your WordPress site, it doesn’t have to be difficult or overwhelming. The key is to take things one step at a time.

If you need some help with launching your website or upgrading the one you have, do not hesitate to contact me.